Showing posts with label Main Dish. Show all posts

Monday, May 14, 2012

Grilled pizza

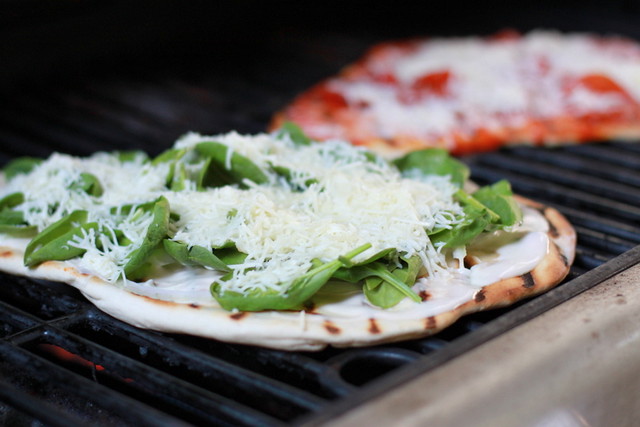
Last week I was on a mission to make grilled pizza.

IMG_8458

It was a very adventurous time, really.  I learned many things while making grilled pizza.

The first one, obviously, is to make sure you have enough propane in your gas grill.  That is THE most important thing!!!  By the time I was on my second batch, the propane ran out in the grill .... and my husband was out of town and I had no clue how to change the propane tank.

First I made dough using the Pizza Dough packet of yeast.  It required no rising of the dough (which I have the hardest time w/ in the first place).  I did have to make two packets worth b/c one packet only makes a pizza about as large as 12 inches.  Everybody had their only little pizza.

First, turn the grill on to high.  If you can handle the heat.... try to put some olive oil on the grates.  I tried, and it was hard to do, so I gave up.  I did clean it really good w/ our BBQ brush.

After you follow the directions on the packet, work your pizza out into a circle using your hands.

Then place it on the grill that is on high for 2 minutes.  You might want to even turn down the grill a little bit b/c our first pizza burned in 2 minutes.  Or, just keep an eye on the pizza.

Take it off the grill (I used a cutting board to slide the pizza on and off) and flip it so the cooked side is on the top.  Then, place your toppings on the pizza.  By this time, turn your heat down to medium high.

Put the pizza back on the grill, and let it cook for about another 3-5 minutes, or until the bottom is getting a little brown.

Ta da!!  It's done!  It actually cooks a LOT faster than the oven, and definitely has a different type of taste than an oven baked pizza.
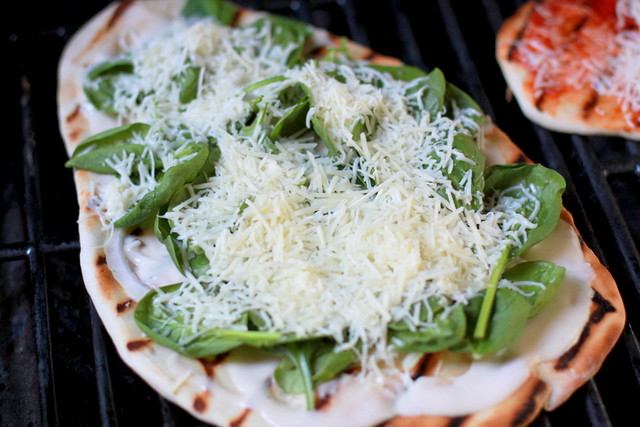
IMG_8460-001


Sunday, February 7, 2010

.... crock pot pinto beans

I think I did it!! I found THE recipe for our pinto beans!! I always add too little water (which result in dry beans, or burnt if you are like me...), or not enough flavoring (which turn out to be BLAND beans), or the WRONG flavors....

However, I've been playing around for 13 years people... 13 years trying to find the right combination. I think I found it. So easy, and SO few ingredients!! My husband LOVES pinto beans, so we stock up on pinto beans from the cannery. It's a great CHEAP dinner... and lots of possibilities you can do with beans. Make a "build your own dinner w/ pinto beans", or beans with fried potatoes & cornbread... or... well, that's all that I do, really. Just those two type of dinners.

Anyways, here is what I use:

Ingredients
2 cups dried pinto beans
6 cups of water
1 can of Rotel (you determine spicy level)
3 cut up pieces of bacon
salt


First, measure out your beans, and put it in a colander. Take out all the halved pieces.. and rocks. I would like to know how rocks get in here! Rinse it. Put a liner in your crockpot (it's a MUST for me nowadays!), and dump the rinsed beans inside. Place the water (you can add 8 cups if you want....). Dump the can of rotel, or any off brand of tomatoes with chile's (I also like Aldi's brand!). Cut up the bacon (leave it raw), and dump it inside the crockpot.

Turn it on high and let it cook all day. When it's near the time to eat, taste it, and add salt. I typically have to salt, then taste, then salt some more, and taste again. The bacon & the Rotel gives it a great taste! Now, I did try the HOT Rotel once, and let me tell you, my husband LOVED it, but it was WAY too hot for me & the girls!! So, we stick with the regular Rotel. We're creampuffs......

Maddie & I love our beans over Frito's with sour cream & cheese. Mike & Katie eat the beans as a burrito. We also make "Big Daddies", which are fried flour tortillas and you basically build it up as a tostada. Make sure to add diced pickles at the end for that dinner! Yumm!

Sunday, January 17, 2010

butter yaki & won tons


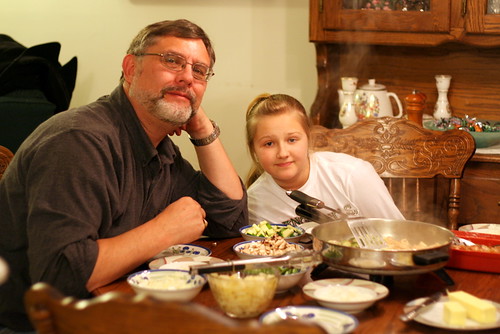
In continuing with my winter vacation stories.... I have to show the pictures of a big tradition that my family has. Ever since I was a little girl, we have made a dinner called "butter yaki". Now, my spelling of this Japanese dinner might be off, but in short, you cook it in an electric skillet, using butter to cook the vegetables & marinated meat. My family "adopted" a man named Floyd, who lived in Kansas City to go to dental school when I was little. He was the one who taught the family this amazing meal. I have also heard he named his daughter after me as well.... :)

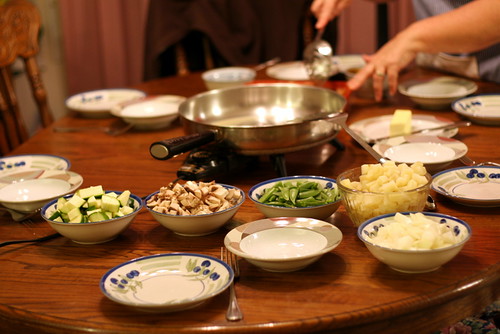
There is a lot of preparation for this dinner. My parents start soaking the chicken (or steak) in homemade teriyaki sauce the night before. My mom likes to cut up the meat when it's still partially frozen and cuts it very thin (that way it cooks faster). Then she pours the marinade over the meat and places it back in the fridge.

We use all different kinds of vegetables. Broccoli, sprouts, potatoes, zucchini, mushrooms, onions, snow peas... you name it! We all give our opinion on what we want in our stir fry....

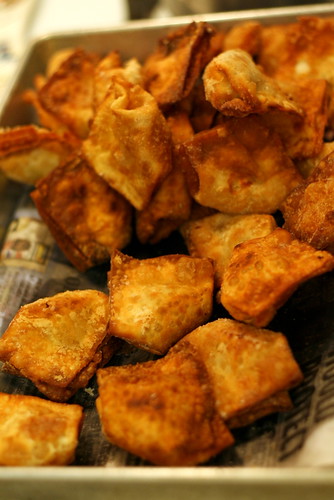
This is my dad. He's the cook of the night... always the cook the night we have butter yaki. It's just the way we roll in our family. Dad cooks the butter yaki. He takes a little of each ingredient and stirfries it... and serves it to us. Then he does it again: melt butter, add meat, & add veggies. He usually does about 3-4 rounds of this. We always have leftovers. Mom makes the rice and fries the won tons. Oh, won tons you asked? Now, THIS, is my most favorite food in the ENTIRE world. Other than chocolate. Every year my mom always asks me what I want for my birthday dinner, and it's always won tons. I would be perfectly happy with just won tons. Nothing else.

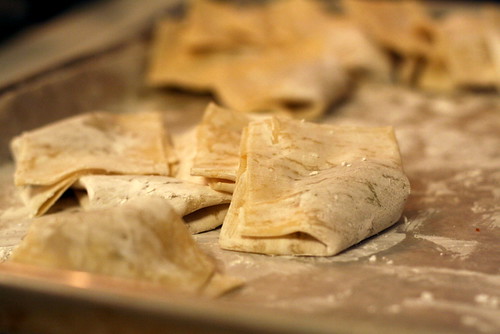
It also takes a bit of time to prep these babies. You mix up the mixture of chicken, green onions, soy sauce & egg whites. Then you buy the won ton wrappers, spread a little in the middle, and fold it accordingly. My girls are now helping with the job that my brother and I held for so many years. I love teaching them the tricks that I learned... {use the fingers!}

Then, my mom fries them. Yummm! Keeps them warm in the oven until it's time to eat.


In order to fully appreciate won tons, we dip them in a sauce made out of mustard & soy sauce. One can also use plum sauce. Very delicious!


My dad this year made virgin strawberry margaritas for us (the kind in the bucket, w/ ginger ale). Again, a very special dinner for our family! We don't get it often, but when we do get it, it's a special treat for us!

Won Tons:
1 chicken breast
2 egg whites
4-5 green onions
soy sauce (dribble)

Put all in a food processor and blend (process? mince?)

Spoon a small amount in the middle of a won ton wrapper, place water on the outside edges of the wrapper, fold into a triangle, then take the corner and fold into the top part of the triangle. Do this for the opposite side. Place on a cookie sheet that has cornstarch on the bottom to prevent sticking while it's waiting to fry!

Teriyaki Marinade
1 3/4 c water
grated ginger root (fresh!) -- maybe a tbsp?
3/4 c brown sugar
3/4 c soy sauce


Heat water, then add brown sugar so it melts. It's always equal parts brown sugar & soy sauce, and double that amount in water. So if you need to marinate a TON of meat, then that's the portions you need to use!

Monday, November 30, 2009

saucy parmesan chicken

Found this amazing recipe in the Kraft's magazine a few years ago. This is a keeper! And it's FAST!

Ingredients
4 boneless chicken breasts (I use chicken strips/tenders)
1/4 c Italian dressing
1/4 c parmesan cheese

Place all ingredients in a resealable bag. Turn over several times to coat well. Refrigerate for 30 minutes to marinate, making sure chicken is not overlapping each other. Prehead oven to 350 degrees. Arrange chicken on a piece of foil. Bake for 20 minutes or until cooked through.

Amy's Note: I use the cheapest Italian dressing I can find. It works just as well as the expensive stuff!! I also use the chicken strips/tenders for this recipe. Also this recipe is great with buttered parmesan noodles!

chicken parmesan strips

My grandma gave me this Weight Watchers recipe a few years ago, and it's HEALTHY!! It's also very yummy! My girls love this recipe! I love to stock up on the chicken tenders/strips when they're on sale and use it in this recipe.

Ingredients
1 lb chicken strips
1/2 c skim milk
1/3 c nonfat dry bread crumbs
3 tbsp grated parmesan cheese
2 tsp dried parsley
1/4 tsp black pepper


Place chicken in shallow bowl and cover with milk. Cover & refrigerate for at least 15 minutes or up to 4 hours. Combine rest of ingredients. Dip chicken pieces into crumb mixture to coat well. Place on sprayed baking sheet. Spray each piece of chicken with olive oil spray. Bake 20 minutes or until brown and done. {bake at 350 I think ... maybe it's 400?! Just watch it!)

Amy's Note: I only have Italian bread crumbs on hand, so it gives an extra taste! I also don't spray each chicken piece with olive oil spray. You don't need it!

Sunday, April 12, 2009

{coca cola ham}

This is more of a reminder to myself of what TO do the next time I bake a ham. Considering it was the first time I've ever made ham...... ever, it turned out REALLY awesome. I'm typing it up so I don't forget how I made it. It's going to look a little juvenile the way I type it, but oh well..

I had a spiral cut ham (bone-in). It came w/ a packet of honey glaze that I had to add water & heat up on the stove.

I poured a can of Coke on the bottom of my huge roasting pan, and dumped the ham face down (tiny part of the ham was sticking up). Covered it all with foil. Then, I didn't baste it. Couldn't find my baster thing. I was supposed to, but it turned out delicious without basting it.

I baked it for 1 hour at 350 (it was cooked already), then took it out, place it on my roaster flat (skinny part of the ham was laying sideways now), separated some of the slices, and spread the glaze over it. Then baked it for another 10 minutes at 425.

It was so delicious.....

Thursday, April 9, 2009

{lasagna}

This is my mom's recipe. I had to have her come over one day after I was married to show me how to make it. It turned into an all day event. ::rolling eyes:: But, I have it down to a pat now, it DOESN'T take me all day, just an hour or less. :) Serve with a delicious salad & garlic bread.

Ingredients:
16 oz box lasagna noodles
1 egg
1 container cottage cheese (large)
2 tbsp parsley
parmesan cheese (1/4 cup in & on top)
2 - 8 oz mozzarella cheese
1/2 tsp garlic powder
1 lb hamburger
1 onion, chopped
2 jars spaghetti sauce
Boil lasagna (see my notes!). Brown hamburger with onions in it. Drain the cottage cheese. Mix egg, cottage cheese, parsley, 1/4 c parmesan cheese, 1 package of mozzarella cheese & garlic powder. Mix spaghetti sauce with hamburger after it is browned & drained of fat. Spread a little sauce on bottom of 9x13 pan, layer with noodles, then add a little cheese mixture, then sauce. Do it again with noodles, cheese mixture then sauce, etc. Keep going until you get to the top or you run out of cheese mixture & sauce. Add another package of mozzarella cheese on the top, and sprinkle with 1/4 c of parmesan cheese. Bake for 40 minutes - 1 hour at 350. Let stand for 10 minutes before serving.
Amy's Notes:
*I no longer boil my noodles. Some people prefer to boil the noodles, but now I save myself even more time and buy the "no boil" noodles. SO easy!
*I buy the cheap spaghetti sauce (like the 99 cents in a tin can kind). I can't taste a difference anyways, so why not go cheap? Especially with all the ingredients it can get a little expensive, cut corners on brand names whenever possible!
*Make SURE you let it sit for a bit before serving! Otherwise your beautiful lasagna will turn into a soup if you serve it immediately after pulling it out of the oven!

{green chili chicken enchiladas}

This is the ONLY recipe I know by heart. Sad, isn't it?! It's not spicy at all, and only one kid will eat it (Katie refuses to eat anything Mexican, it seems... except burritos). This is made kind of in layers, so it's more of a casserole type of enchiladas than a rolled enchilada.

Ingredients:
1 can cream of mushroom
1 can cream of chicken
1 can diced green chili
1 c diced onion
1 big can of chicken
corn tortillas
tons of grated cheese (1-2 bags)
OK... here is where it gets kind of tricky. If you want to make a full 9x13 pan, then double the chicken, green chilis, onion (but keep the cream of soups the same). I usually do a 9x9 pan, or a pan that is still rectangle but slightly smaller than 9x13.
Combine all the soups, chicken, onion (NOTE! I usually saute my onions a little first so it gets the strong "oniony" taste out a bit!!). Layer a thin spread of soup mix on bottom of dish. Layer with tortillas, soup mix, then cheese. Repeat layers, ending with cheese. Bake at 350 for 30-45 minutes, or until bubbly. Let stand 10 minutes before serving.
Amy's Notes:
*Sometimes I make this and freeze it, so I have a fast meal on hand.
*I don't always use just cheddar cheese. Sometimes I've used a mixture of mozzarella cheese & cheddar (which is fantastic!), and also the Kraft brand "Mexican" mixture of cheese. That adds a little bit of zing to the taste, I think!!
*and I mentioned the onion. I saute my onions from now on b/c some onions I buy are just SO strong! When I saute them, it takes out the taste a bit.
*I'm too lazy to boil my chicken, then shred it. So, I just get out a can of chicken from my food storage/pantry and cut it open. Easy!

{fettuccini alfredo}

I found this recipe on topsecretrecipes.com.... it's a knock off recipe from Olive Garden's Fettuccini Alfredo, and SO yummy (and very much high calorie... SORRY!!)! Sometimes I top it with grilled chicken, sometimes I don't. Serve it with a salad & long rolls, and it's perfecto!

Ingredients:
1 stick butter
2 cloves garlic, minced
2 c heavy whipping cream
1/8 tsp ground black pepper
pinch salt
1/2 c parmesan cheese
Melt butter in saucepan over medium/low heat. Add garlic, cream, salt & pepper and bring mixture to simmer. Turn head down if it reaches a rapid boil. Add cheese & continue to simmer for 8 minutes.
Amy's Notes:
*Make sure the water for the fettuccini is boiling when you start this, and dump the pasta in the water. This alfredo sauce will take awhile to cook (maybe 20 minutes?)....
*This sauce would also be good on a pizza with chicken on it!!

Wednesday, April 8, 2009

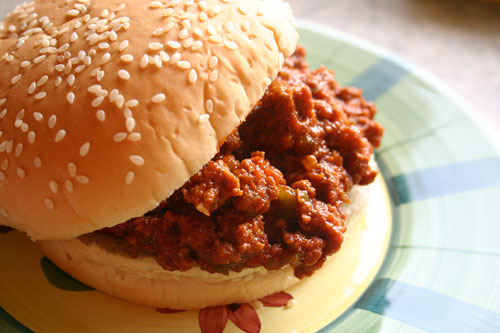
{knock off manwich}


Knock Off Manwich


one 8 oz can of tomato sauce
1/4 tsp dry mustard
2 Tbsp honey
1 tsp Worchestire sauce (or however you spell it)
1/2 tsp salt
1/4 tsp black pepper


Let simmer for about 5 minutes or so, and it's DONE! The mixture is enough for a pound of hamburger, so double accordingly if you have a huge family. I love this moreso than Manwich itself, which is almost too sweet in a way. This was a little sweet, but not overbearingly sweet.


Definitely a LOT cheaper than buying Manwich!

{sweet 'n spicy pulled pork}

So easy, only 3 ingredients. Eat your hearts out!

Sweet 'n Spicy Pulled Pork
1 1/2 c salsa (I used Pace Picante, medium)
1 1/2 c brown sugar
3-4 lbs pork roast

Mix the salsa & brown sugar together. Sit the pork roast in a crockpot, pour mixture over top of roast. Cook on high for 6-7 hours. It will shred by itself. I helped it along by shredding some more and pulling all the fat out at the end. No need to add water as the water will come out of the pork roast.

This recipe is so yummy, so moist, and yet sweet but a little spicy! I took those mini rolls from Sam's so we ate it like a sandwich. Mike wants me to add a habanera pepper next time. Yikes!

{meatloaf}


MEATLOAF

2 lbs ground beef
2 eggs, beaten
1 c oats
1/2 c ketchup
1/2 c chopped onion
1/4 c chopped green pepper
1 tsp black pepper
1/2 tsp salt
1/2 tsp garlic powder
1/2 tsp basil


Mix all together by hand and place in a loaf pan. Cook for 1 hour at 350 degrees, or until done.
Related Posts with Thumbnails