I found this dip recipe on my friend Melissa's blog ... and I had seen similar recipes on Pinterest floating around. Everyone is saying this dip is AH-MAZ-ING! So, for the 4th of July, I took it to our bash and everyone loved it! I did change a thing or two up from Melissa's recipe, but it is really yummy!
List of Ingredients
2 pkgs of cream cheese (16 oz total) -- room temperature!
1 can drained corn
1 small can chopped black olives
1 pkg Hidden Valley Ranch dressing (dry mix)
1 jar of Hot & Sweet jalapeno (12 oz) -- drain and reserve 1/4 cup of the juice
1 red pepper diced
I placed the jalapeno's in my mini food processor and diced it up until it is fine. I had my big mixer going and added the cream cheese and all the other ingredients until it is mixed well. Add the jalapeno's and 1/4 cup of the juice from the jalapeno's.
I served this with corn chips, but I figured you could use anything! Crackers, pita chips, etc. Even though it calls for jalapeno's, it is NOT hot!!
Friday, July 6, 2012

Thursday, June 14, 2012
molasses cookies
When I was growing up, I had a best friend named Kathy. I would spend a week in the summer at her farm. Her mom had a lot of homestyle foods that she made. One of the recipes she made, was this molasses cookie recipe. It's so delicious and yummy.

List of Ingredients
3/4 cup shortening
1 cup sugar
1 egg
3/4 cup molasses
2 1/4 cup sifted flour
2 tsp baking soda
1/4 tsp salt
1 tsp cinnamon
3/4 tsp ground cloves
3/4 tsp ginger
Mix together. Form into balls and roll in granulated sugar (this is extra sugar on top of what you will put in the recipe). Bake at 350 degrees for 8-12 minutes on ungreased pan.
Amy's Notes: I love Grandma's brand of molasses. I also had a hard time figuring out when to take the cookies out of the oven because they're already brown! That being said, I actually went to the 12 minute mark before I took them out, and they didn't burn. These are the firm, yet chewy type of cookie. I also used parchment paper to place my cookies on in the oven ... like I do all my cookies!
Monday, May 14, 2012
Grilled pizza
Last week I was on a mission to make grilled pizza.

It was a very adventurous time, really. I learned many things while making grilled pizza.
The first one, obviously, is to make sure you have enough propane in your gas grill. That is THE most important thing!!! By the time I was on my second batch, the propane ran out in the grill .... and my husband was out of town and I had no clue how to change the propane tank.
First I made dough using the Pizza Dough packet of yeast. It required no rising of the dough (which I have the hardest time w/ in the first place). I did have to make two packets worth b/c one packet only makes a pizza about as large as 12 inches. Everybody had their only little pizza.
First, turn the grill on to high. If you can handle the heat.... try to put some olive oil on the grates. I tried, and it was hard to do, so I gave up. I did clean it really good w/ our BBQ brush.
After you follow the directions on the packet, work your pizza out into a circle using your hands.
Then place it on the grill that is on high for 2 minutes. You might want to even turn down the grill a little bit b/c our first pizza burned in 2 minutes. Or, just keep an eye on the pizza.
Take it off the grill (I used a cutting board to slide the pizza on and off) and flip it so the cooked side is on the top. Then, place your toppings on the pizza. By this time, turn your heat down to medium high.
Put the pizza back on the grill, and let it cook for about another 3-5 minutes, or until the bottom is getting a little brown.
Ta da!! It's done! It actually cooks a LOT faster than the oven, and definitely has a different type of taste than an oven baked pizza.


It was a very adventurous time, really. I learned many things while making grilled pizza.
The first one, obviously, is to make sure you have enough propane in your gas grill. That is THE most important thing!!! By the time I was on my second batch, the propane ran out in the grill .... and my husband was out of town and I had no clue how to change the propane tank.
First I made dough using the Pizza Dough packet of yeast. It required no rising of the dough (which I have the hardest time w/ in the first place). I did have to make two packets worth b/c one packet only makes a pizza about as large as 12 inches. Everybody had their only little pizza.
First, turn the grill on to high. If you can handle the heat.... try to put some olive oil on the grates. I tried, and it was hard to do, so I gave up. I did clean it really good w/ our BBQ brush.
After you follow the directions on the packet, work your pizza out into a circle using your hands.
Then place it on the grill that is on high for 2 minutes. You might want to even turn down the grill a little bit b/c our first pizza burned in 2 minutes. Or, just keep an eye on the pizza.
Take it off the grill (I used a cutting board to slide the pizza on and off) and flip it so the cooked side is on the top. Then, place your toppings on the pizza. By this time, turn your heat down to medium high.
Put the pizza back on the grill, and let it cook for about another 3-5 minutes, or until the bottom is getting a little brown.
Ta da!! It's done! It actually cooks a LOT faster than the oven, and definitely has a different type of taste than an oven baked pizza.

Saturday, February 25, 2012
grandma's lemon cake
This is one of my favorite cakes that my grandma makes. It's incredibly moist and is a great break away from the chocolate cakes that I love! It's also INCREDIBLY easy with just a few ingredients!

Ingredients:
1 box of white or yellow cake mix
4 eggs
3/4 cup oil
1 small box of lemon jello
1 cup hot water
Glaze:
1 cup of confectioners sugar (or a little more if desired)
4 tbsp lemon juice
Instructions:
Pour 1 cup of hot water in a measuring dish and dissolve the lemon jello.
Mix the cake mix, egg, oil and water with lemon jello together for several minutes.
Spray bundt pan with Pam.
Pour into a bundt pan (or a 9x13 pan) and bake for approximately 40 minutes or until toothpick is clean and edges are pulled away from pan.
Let sit for 10 minutes before turning over onto a platter. (sometimes I have to run a spoon down the side in order to get it to loosened from the pan).
Pour the glaze over the cake. Wrap the cake up nice & tight (and place in fridge if you'd like) -- it's best when it's super moist!
Amy's Tips: You can make this into a lime or orange cake as well! Just use the appropriate jello (lime jello, orange jello), and then lime juice or orange juice for the glaze. My grandma also uses either white or yellow cake. She did say at one time the white cake mix will bring out the lemon flavor more (in this case of the picture above, I used the yellow cake mix because it is what I had on hand).
Thursday, January 19, 2012
Seven Layer Bars (7 layer bars)
I have heard of these 7 layer bars (or seven layer bars) ... and thought I'd try it out last week.
They were gone in a day and a half. My family LOVED this recipe! Not to mention super easy to make.
Actually, for me, it's a 6 layer bar. I didn't add nuts to it. I'm not fond of nuts in my food. Separate? Yes. In my food? No.
Here is the recipe (from Eagle Brand)
1 1/2 c graham cracker crumbs
Let it sit for 10 minutes, and then take a knife and lightly make indentions on where you want the bars to be cut. Let sit for another 10 minutes, then place in the fridge. Cutting it will be much easier when it is cold and hardened.
I also took pictures!! (surprise surprise!)

Yummm.... look at it up close!

What it looks like when it comes out of the oven!

Wait about 10 minutes after pulling from the oven. Then, lightly cut into squares (I managed to get 35 bars). Let it sit for a bit longer, then place in the fridge for a few hours. You'll be able to cut into bars MUCH easier when it's cold since it has already been cut.

They were gone in a day and a half. My family LOVED this recipe! Not to mention super easy to make.
Actually, for me, it's a 6 layer bar. I didn't add nuts to it. I'm not fond of nuts in my food. Separate? Yes. In my food? No.
Here is the recipe (from Eagle Brand)
1 1/2 c graham cracker crumbs
1/2 c butter/margarine
1 can sweeten condensed milk
1 c chocolate chips
1 c butterscotch chips
1 1/3 c coconut
Preheat oven to 350. Melt the margarine/butter and then mix it with the crumbs. Spray a 9x13 pan with Pam, and then add the crumb mixture, pressing down. Pour half of the sweetened condensed milk over the crumbs. Add the chocolate chips, butterscotch chips and coconut (nuts too... if you wish). Finally, pour the rest of the milk over the top, and then back for 25 minutes or until light brown on top.Let it sit for 10 minutes, and then take a knife and lightly make indentions on where you want the bars to be cut. Let sit for another 10 minutes, then place in the fridge. Cutting it will be much easier when it is cold and hardened.
I also took pictures!! (surprise surprise!)
Yummm.... look at it up close!
Spreading the rest of the milk on top.
What it looks like when it comes out of the oven!
Wait about 10 minutes after pulling from the oven. Then, lightly cut into squares (I managed to get 35 bars). Let it sit for a bit longer, then place in the fridge for a few hours. You'll be able to cut into bars MUCH easier when it's cold since it has already been cut.
Thursday, January 5, 2012
Mistletoe Cookies
A few years ago a dear neighbor brought me these green cookies shaped as a wreath with red hots as the ornaments. I loved them. Over a year ago, another friend brought these same cookies to a church activity, and I remembered that I loved them.
So this year, the girls and I decided to make them on Christmas Eve. Only .... the wreath part didn't happen (the circle part). It just was too messy to make them into circles. So we just plopped them down on the wax paper ... and I called them Christmas Blobs.

When we took the cookies to a dinner on Christmas at a friend's house, one of the husbands said "hey, these look like mistletoes!" so we renamed them Mistletoe Cookies!
We love them! Here is the recipe (I got it from allrecipes)


So this year, the girls and I decided to make them on Christmas Eve. Only .... the wreath part didn't happen (the circle part). It just was too messy to make them into circles. So we just plopped them down on the wax paper ... and I called them Christmas Blobs.
When we took the cookies to a dinner on Christmas at a friend's house, one of the husbands said "hey, these look like mistletoes!" so we renamed them Mistletoe Cookies!
We love them! Here is the recipe (I got it from allrecipes)
- 1/2 cup butter
- 4 cups miniature marshmallows
- 1 tsp green food coloring
- 1/2 tsp almond extract
- 1/2 tsp vanilla extract
- 4 cups cornflake cereal
- 1 package cinnamon red hot candies
- Microwave marshmallows and butter on High for 2 minutes. Stir, then microwave on High for 2 minutes more. Stir.
- Add and mix quickly the coloring, extracts, then cornflakes. Drop by spoonfuls in clumps on greased wax paper and decorate with 3 red hots each.
- Once cool, transfer to lightly greased serving/storage tray with lightly greased fingers.
Tuesday, December 13, 2011
Sierra Nuggets (aka ... full of spices chocolate chip cookies)
Many many years ago when I was a little girl, my aunt made these cookies. I fell in love. Their spices just created an amazing explosion in my mouth. I make these every December for Christmas == but are good anytime of the year! The ingredients are out of this world -- but I promise, they are extremely good!


DIRECTIONS
Preheat oven to 350 degrees.
CREAM TOGETHER:
1 c butter 1 c brown sugar 1 1/2 c sugar
ADD:
1 Tbsp milk 1 1/2 tsp vanilla
BEAT & ADD:
2 eggs
STIR IN:
1 c corn flakes (dry & crumbled) 3 c oats
SIFT TOGETHER THEN ADD:
1 1/2 c flour
1 1/4 tsp baking soda
1 tsp salt
1/2 tsp mace
1 1/2 tsp cinnamon
1/4 tsp nutmeg
1/8 tsp ground cloves
STIR IN:
4 oz coconut 1 pkg chocolate chips
Drop by well rounded teaspoons onto greased cookie sheet (or parchment paper). Bake 10 minutes or until done. Yields 8 dozen.
AMY'S NOTES: I did not sift all those dry ingredients... I added them to the mixture and they turned out fine. I also always bake w/ parchment paper -- I never have to grease the cookie sheet or anything, and my cookies always turn out perfect! It always states that it yields 8 dozen... but w/ my cookie scooper, it yields maybe 5 1/2 dozen? If you make them smaller, then for sure it will make that many. I also found that my time needed 11 minutes -- wait until it gets a little bit golden before you take them out.
Another side note: Since I didn't want to make the entire batch of cookies in one time, I used my cookie scooper and dropped them into a mini muffin pan and placed it in the freezer. When they froze completely, I took them out with a spoon, and put in a freezer bag. Now I'm able to make a few cookies at a time whenever I want!
Monday, September 19, 2011
Peach Crisp
Book Club was last Thursday night, and I'm hankering for fall desserts. Even when it's 99 degrees outside in the middle of September... I want it to be fall!
Found this recipe online at allrecipes.com, and modified it a little to fit my needs.
It's most definitely a keeper!
**Note: I used canned peaches!! I just didn't add any of the juice to the pan.
Preheat oven to 375 degrees and grease an 8 inch square baking pan.
Place peaches in the bottom of the baking dish, and sprinkle them w/ almond extract.
In a bowl, combine the flour, oatmeal, sugar, brown sugar, spices and salt. Cut the butter into the flour mixture w/ a pastry cutter until the mixture resembles crumbs.
Sprinkle the flour mixture in an even layer over the top of the peaches. Bake in the preheated oven for about 45 minutes, or until the peaches are bubbling and the topping is browned.
**Amy's Notes: I doubled the recipe to make a 9x13 pan, and got the big can of peaches at Sam's Club ($3.90). I didn't use all of the peaches, but I did make sure I got a lot in the pan. I also used half margarine and half butter -- make sure it's softened first! Serve with vanilla ice cream! Super yummy!
Found this recipe online at allrecipes.com, and modified it a little to fit my needs.
It's most definitely a keeper!
List of Ingredients
6 fresh peaches, peeled, pitted & sliced
1/2 tsp almond extract
1/2 c flour
1/2 c oatmeal
1/4 cup brown sugar
3/4 cup white sugar
1/2 tsp ground cinnamon
1/4 tsp salt
couple shakes of nutmeg
1/2 cup butter
**Note: I used canned peaches!! I just didn't add any of the juice to the pan.
Preheat oven to 375 degrees and grease an 8 inch square baking pan.
Place peaches in the bottom of the baking dish, and sprinkle them w/ almond extract.
In a bowl, combine the flour, oatmeal, sugar, brown sugar, spices and salt. Cut the butter into the flour mixture w/ a pastry cutter until the mixture resembles crumbs.
Sprinkle the flour mixture in an even layer over the top of the peaches. Bake in the preheated oven for about 45 minutes, or until the peaches are bubbling and the topping is browned.
**Amy's Notes: I doubled the recipe to make a 9x13 pan, and got the big can of peaches at Sam's Club ($3.90). I didn't use all of the peaches, but I did make sure I got a lot in the pan. I also used half margarine and half butter -- make sure it's softened first! Serve with vanilla ice cream! Super yummy!
Wednesday, September 14, 2011
How to make whipped cream
I have the hardest time remembering how to make whipping cream. It NEVER turns out right! Thankfully, I found a good tutorial online ... somewhere... and I tried it out last night when I made my husband's birthday cake.
First of all, get the mixing bowl you are going to use, and the mixer tool (not the actual mixer, but those ... things!) and put it in the fridge for at least 30 minutes.
After the bowl and beaters are chilled, pour the heavy whipping cream in the bowl, and add the vanilla and sugar.
Whip on medium until soft peaks are formed when you left your mixer.
Taste ... if it needs more sugar, add a little at a time. **NOTE: some people add sugar and vanilla at the end .. I added it at the beginning by accident and it still was OK.
If you want to make chocolate whipping cream, add 3 Tbsp of cocoa powder plus another 1 1/2 tbsp of sugar (taste it as you go).
Here is a GREAT link for more flavors and whipping cream recipes
Just an FYI: One cup of whipping cream equals 2 cups of the whipped cream. For the above recipe, you can always cut in half for a smaller portion!
Cast of Ingredients
16 oz of heavy whipping cream
sugar (start with 2 Tbsp)
vanilla (1 tsp)
First of all, get the mixing bowl you are going to use, and the mixer tool (not the actual mixer, but those ... things!) and put it in the fridge for at least 30 minutes.
After the bowl and beaters are chilled, pour the heavy whipping cream in the bowl, and add the vanilla and sugar.
Whip on medium until soft peaks are formed when you left your mixer.
Taste ... if it needs more sugar, add a little at a time. **NOTE: some people add sugar and vanilla at the end .. I added it at the beginning by accident and it still was OK.
If you want to make chocolate whipping cream, add 3 Tbsp of cocoa powder plus another 1 1/2 tbsp of sugar (taste it as you go).
Here is a GREAT link for more flavors and whipping cream recipes
Just an FYI: One cup of whipping cream equals 2 cups of the whipped cream. For the above recipe, you can always cut in half for a smaller portion!
Tuesday, August 30, 2011
BBQ Chopped Salad
I love BBQ chopped salad! Every time I go to BJ's, I order it. Cheesecake Factory has it .. and I am in love!! I knew it would be relatively easy to make -- but I do have one picky child who has a slight aversion to vegetables. If SHE will eat this, then I know I have a winner!!
I searched the internet to find a relatively easy recipe, and from there, just created my own salad.

Did my one said child eat the salad? Yep! My other salad eating child proclaimed it to be "the very best salad I have ever eaten!" It truly was delicious!
I searched the internet to find a relatively easy recipe, and from there, just created my own salad.
Ingredients
1 head of iceberg lettuce
1/2 of a jicama
1 can of corn (drained)
1 can of black beans (drained)
2 roma tomatoes (cut small)
1 green onion, cut thinly
1 avocado
Monterey Jack cheese (shredded)
grilled chicken w/ BBQ sauce on top
1/3 cup of BBQ sauce
1/3 cup of Ranch dressing
(optional) French's Fried Onions
It was a time consuming process all at once -- but if you could have some of these already cut up, then it could be assembled fast. While the chicken is grilling, cut up the lettuce into small pieces, cut up the jicama, tomatoes & green onion. Drain the corn and black beans. Cut up the avocado.
I had four plates -- and one head of iceberg lettuce was too much, so maybe start with half a head? I just piled on the toppings, complete with the chicken on top. Mix the BBQ and the Ranch dressing together, and that is the dressing that goes on top of the salad. I did not use very much on each person (because of the calorie and sugar count!) -- but enough to give it some taste. I did add some French's Fried Onion on the top of it (b/c BJ's has onion straws on top of theirs) -- but next time I will do without. I couldn't even taste the onions on it! Probably next time I would do two avocados instead of one for four plates.
Next time, I might even do two parts of BBQ to three parts of Ranch dressing. (Maybe do 1/4 cup of BBQ and 1/3 cup Ranch? -- not sure, but I do remember tasting the Ranch dressing more at the restaurants).
Did my one said child eat the salad? Yep! My other salad eating child proclaimed it to be "the very best salad I have ever eaten!" It truly was delicious!
Monday, August 29, 2011
Coconut Lime Banana Zucchini Bread
Wow! That was a mouthful to say and to type! I got this recipe from a friend of mine (Jen)'s friend Cynthia (thanks Cynthia!)! She posted on Facebook that she was making this bread, and I was curious and asked her to share the recipe! She did! I'm not sure where she got the recipe, but I made it today! It was delish!

Directions:
1) Mix the first three dry ingredients in a small bowl and set aside.
2) Mash up the bananas with a fork and set aside.
3) Crack two eggs and toss them in your mixer. Add the butter. Add the sugar and beat everything on medium speed for about 1 minute. Add the bananas, zucchini, yogurt, apple juice/sauce, vanilla and coconut.
4) Mix until well blended. Add the dry ingredients. Mix until moist. Pour into greased bread pan (spray w/ Pam first!), and then sprinkle coconut on top. Bake for approximately an hour at 350 degrees.
5) Prepare the glaze: mix 2 ingredients into bowl until glaze is slightly runny.
6) When bread is done, let it cool on a rack for 5 minutes, then take out of pan and pour glaze over the top (put wax paper or pan down to catch the drips).
7) Cut a slice, place a bite in your mouth, sigh and close your eyes. Yummm! Feel all those flavors come together and party in your mouth!
Amy's Notes:
OK, I added a full stick of butter!! OOPS! It was still delicious (probably made it even more delicious?). I also used unsweetened applesauce, not apple juice. I did not follow the directions to the T (meaning I added the eggs after I beat the butter and sugar -- it still turned out). And finally... I added a ton more coconut on top than what the recipe called for. I also baked for about an hour and 7 minutes -- it probably could've been reduced to about 325 for 10 minutes after the hour b/c some of the middle was still runny!

Ingredients
2 cups all purpose flour
3/4 tsp baking soda
1/2 tsp salt
1 cup sugar
1/4 cup (1/2 of a stick) softened butter
2 eggs
1 to 1 1/2 cups smashed bananas (about 3 bananas)
1/4 cup yogurt (plain or vanilla)
3 tbsp apple juice or applesauce
1/2 tsp vanilla
1/2 cup coconut flakes
1 tbsp coconut (to sprinkle on top)
1 zucchini, grated
Glaze
1/2 cup powdered sugar
approximate 1 1/2 tbsp fresh lime or lemon juice (about 1 lime)
Directions:
1) Mix the first three dry ingredients in a small bowl and set aside.
2) Mash up the bananas with a fork and set aside.
3) Crack two eggs and toss them in your mixer. Add the butter. Add the sugar and beat everything on medium speed for about 1 minute. Add the bananas, zucchini, yogurt, apple juice/sauce, vanilla and coconut.
4) Mix until well blended. Add the dry ingredients. Mix until moist. Pour into greased bread pan (spray w/ Pam first!), and then sprinkle coconut on top. Bake for approximately an hour at 350 degrees.
5) Prepare the glaze: mix 2 ingredients into bowl until glaze is slightly runny.
6) When bread is done, let it cool on a rack for 5 minutes, then take out of pan and pour glaze over the top (put wax paper or pan down to catch the drips).
7) Cut a slice, place a bite in your mouth, sigh and close your eyes. Yummm! Feel all those flavors come together and party in your mouth!
Amy's Notes:
OK, I added a full stick of butter!! OOPS! It was still delicious (probably made it even more delicious?). I also used unsweetened applesauce, not apple juice. I did not follow the directions to the T (meaning I added the eggs after I beat the butter and sugar -- it still turned out). And finally... I added a ton more coconut on top than what the recipe called for. I also baked for about an hour and 7 minutes -- it probably could've been reduced to about 325 for 10 minutes after the hour b/c some of the middle was still runny!
Saturday, April 16, 2011
Whoopie Pies!!
I had to laugh when I titled this post "Making Whoopie Pies." I almost titled it "Making Whoopie", and then thought that probably sounded a little dirty... and totally inappropriate from a mom who blogs mostly about her girls....
It seems like Whoopie Pies are everywhere these days. I see them advertised at my gas station of all places, they're featured in magazines! Featured on blogs! So, I decided they must be really really awesome, and when I saw the recipe in my February Family Fun magazine, I knew I had to get my little baker and get to baking.
So we did! And we learned a lot! First lesson to learn? READ ALL THE DIRECTIONS THOROUGHLY! Remember in 5th grade where you get a paper that has all these questions on it, and you answer away and think "wow, I'm SO going to ace this quiz!" Then when you get to the bottom, the last question said "do not answer any of these questions, and turn into the teacher now." gulp Oops. FAILED big time!
Now, I am trying to teach Maddie how to read a recipe, and when I realized that we were doing it incorrectly, it was a great teaching experience. Now I hung my head in shame.... and happily, they still turned out wonderfully!
I was practicing my photography with my camera on manual -- so I used this opportunity to snap pictures of Maddie in action.


You can get the recipe complete with pictures on the Family Fun website, but I transferred it over for you as well.
2) In a medium bowl, whisk together the flour, cocoa powder, baking soda, and salt. In a glass measuring cup or small bowl, stir together the buttermilk and vanilla extract.
3) In a large bowl with a hand mixer set at medium speed, beat the butter and sugar until evenly blended, about 1 to 2 minutes. Add the egg, increase the speed to high, and beat until smooth and creamy, about 1 minute more.
4) Pour half the flour mixture into the butter-sugar mixture, and beat at medium speed until combined. Add the buttermilk mixture and continue beating until just blended. Add the remaining flour mixture and beat again.
5) Use a cookie scoop or spoon to place a heaping tablespoon of batter on a prepared cookie sheet. Add more mounds of batter, evenly spacing them, until there are nine on each sheet. Slightly flatten each mound with a spoon.
6) Bake the cakes one sheet at a time for 10 minutes (they should be moist and spongy). Let them cool on the sheet for 2 minutes, then carefully transfer them to a rack to cool completely. Reline the sheets and scoop, shape, and bake the remaining batter.
7) Using an electric mixer at medium-high speed, beat all the filling ingredients except the coloring in a medium bowl until evenly blended, about 2 minutes. If you want to give the filling a Valentine hue, fold in drops of red food coloring until the desired tint is reached.
8) To make each pie, spoon and spread a heaping tablespoon of the filling onto the bottom of a cake, then gently press another cake on top.
It seems like Whoopie Pies are everywhere these days. I see them advertised at my gas station of all places, they're featured in magazines! Featured on blogs! So, I decided they must be really really awesome, and when I saw the recipe in my February Family Fun magazine, I knew I had to get my little baker and get to baking.
So we did! And we learned a lot! First lesson to learn? READ ALL THE DIRECTIONS THOROUGHLY! Remember in 5th grade where you get a paper that has all these questions on it, and you answer away and think "wow, I'm SO going to ace this quiz!" Then when you get to the bottom, the last question said "do not answer any of these questions, and turn into the teacher now." gulp Oops. FAILED big time!
Now, I am trying to teach Maddie how to read a recipe, and when I realized that we were doing it incorrectly, it was a great teaching experience. Now I hung my head in shame.... and happily, they still turned out wonderfully!
I was practicing my photography with my camera on manual -- so I used this opportunity to snap pictures of Maddie in action.
we did an "oops" here.....
I love all the flour on her face!
You can get the recipe complete with pictures on the Family Fun website, but I transferred it over for you as well.
- Cake
- 2 cups flour
- ½ cup unsweetened cocoa powder
- 1 teaspoon baking soda
- ½ teaspoon salt
- 1 cup buttermilk
- 1 teaspoon vanilla extract
- ½ cup softened butter
- 1 cup sugar
- 1 egg
FILLING
- ½ cup softened butter
- 1½ cups confectioners' sugar
- 1 cup marshmallow crème
- 1 teaspoon vanilla
- Red food coloring (optional)
2) In a medium bowl, whisk together the flour, cocoa powder, baking soda, and salt. In a glass measuring cup or small bowl, stir together the buttermilk and vanilla extract.
3) In a large bowl with a hand mixer set at medium speed, beat the butter and sugar until evenly blended, about 1 to 2 minutes. Add the egg, increase the speed to high, and beat until smooth and creamy, about 1 minute more.
4) Pour half the flour mixture into the butter-sugar mixture, and beat at medium speed until combined. Add the buttermilk mixture and continue beating until just blended. Add the remaining flour mixture and beat again.
5) Use a cookie scoop or spoon to place a heaping tablespoon of batter on a prepared cookie sheet. Add more mounds of batter, evenly spacing them, until there are nine on each sheet. Slightly flatten each mound with a spoon.
6) Bake the cakes one sheet at a time for 10 minutes (they should be moist and spongy). Let them cool on the sheet for 2 minutes, then carefully transfer them to a rack to cool completely. Reline the sheets and scoop, shape, and bake the remaining batter.
7) Using an electric mixer at medium-high speed, beat all the filling ingredients except the coloring in a medium bowl until evenly blended, about 2 minutes. If you want to give the filling a Valentine hue, fold in drops of red food coloring until the desired tint is reached.
8) To make each pie, spoon and spread a heaping tablespoon of the filling onto the bottom of a cake, then gently press another cake on top.
Saturday, February 5, 2011
Death by chocolate cupcakes.... literally!

Chocolate Mousse inside chocolate cupcake.
Chocolate frosting on top of chocolate cupcake with chocolate mousse inside.
Chocolate candy on top of chocolate cupcake with chocolate mousse inside with chocolate frosting on top.
I mean... what's there not to love about this cupcake? It's a recipe that was created JUST FOR ME!!

Here is the recipe:
List of Ingredients:
1 box Devils Food Cake Mix
1 small box Jello Chocolate Fudge instant pudding mix
4 eggs
1/2 cup vegetable oil
1 cup milk
1 cup sour cream
Chocolate Mousse Filling
2 cups heavy whipping cream
2 cups milk chocolate chips
Chocolate Buttercream Frosting
1 stick softened butter
2 1/2 to 3 cups powdered sugar
1/4 cup cocoa powder
1/2 tsp vanilla
1/4 cup of boiling water
1 bag mini Snickers (I used Reese's Peanut Butter cups)
1. Preheat oven to 350 degrees F. Line 24 cupcake tins with liners. To prepare the cupcakes, place the cake mix, pudding mix, eggs, oil, milk and sour cream into stand mixer. Beat until well combined, about 2 minutes. Scoop the batter evenly into the cupcake liners. Bake for 20-25 minutes or until cupcakes are cooked through and a toothpick comes clean from center. Remove the cupcakes from the tin and let cool.
2. To prepare the mousse, melt the milk chocolate chips in the microwave, stirring every 30 seconds. Set aside to cool. Meanwhile, whip the heavy cream with a stand or electric mixer until it looks like whipped cream and stiff peaks form. Fold melted chocolate chips into whipped cream until well combined, then transfer batches into a piping bag. When cupcakes have cooled, press the tip of the piping bag into the center of the cupcake, about 1 inch deep. Squeeze the mousse into the cupcake while pulling the tip out. It doesn’t take much, just one firm squeeze is perfect. Continue filling all the cupcakes.

3. To prepare the frosting, beat the butter, powdered sugar, cocoa and vanilla & hot water until well combined and a nice frosting consistency. Spread over cupcakes then top with chopped Snickers (or other candy).
Makes 24 cupcakes. (actually, for me, it made 33)
While I loved Amanda's directions and beautiful pictures on her blog that went well with the recipe, I found that I had a few more steps that I needed to do.
- First of all, chill the chocolate mousse!! After you get done making it, put it in the fridge for a bit to harden up.
- Let your cupcakes TOTALLY cool (like, for several hours!) before you pipe it inside the cupcake.
- If you do the Reese's PB Cups, buy like 3-4 of the packages of candy (I'm talking about the individual sized that has 8 in a package?... like for $1 each? I bought only 1 package, and it only covered 8 cupcakes).
- and finally, Amanda didn't have anything liquid for her frosting, and I used this recipe that came out of my Better Homes & Garden cookbook (it's the no-cook Fudge frosting), but it calls for boiling water... butter, vanilla, cocoa powder & confectioners sugar is NOT going to make frosting, something liquid needs to be added, so start w/ 1/4 cup of boiling water and go from there).

::drooling::

Yummmmmmmmmmmmmmmmmmmmm

One final picture??

Tuesday, September 14, 2010
Good for You Choc-Oat-Chip Cookies
I found this recipe years ago in a magazine, of which I can't even remember. However, it is SO delicious, and slightly a little healthier than a regular version of a chocolate chip recipe!
Ingredients:
1 3/4 c flour
1 tsp baking soda
1/2 tsp cinnamon
1/2 tsp salt
1 1/4 c dk brown sugar
1/2 c sugar
1 stick margarine
1/2 c applesauce, unsweetened
2 egg whites
2 1/2 c oats
12 oz chocolate chips
1 3/4 c flour
1 tsp baking soda
1/2 tsp cinnamon
1/2 tsp salt
1 1/4 c dk brown sugar
1/2 c sugar
1 stick margarine
1/2 c applesauce, unsweetened
2 egg whites
2 1/2 c oats
12 oz chocolate chips
Combine flour, soda, cinnamon & salt in small bowl. Beat brown sugar, sugar, margarine & applesauce in large bowl until smooth. Beat in egg whites & vanilla; gradually beat in flour mixture. Stir in oats, chips & if you prefer.... nuts. Drop onto greased baking sheet. Bake in preheated oven at 375 for 9-10 minutes for chewy cookies, or 12-13 minutes for crispy.
Amy's Notes: I'm such a dork sometimes. I didn't read the directions all the way through, and tossed everything in a bowl starting with the flour. Guess what?! IT WAS FINE!!! I also didn't have margarine, just butter. I also didn't have unsweetened applesauce, so I used applesauce with cinnamon. I also didn't have dark brown sugar... just light brown. All in all, they tasted AMAZINGLY awesome! Oh, and I used parchment paper to bake the cookies on.... for 10 minutes for chewy! Take them out before they get brown!!
Amy's Notes: I'm such a dork sometimes. I didn't read the directions all the way through, and tossed everything in a bowl starting with the flour. Guess what?! IT WAS FINE!!! I also didn't have margarine, just butter. I also didn't have unsweetened applesauce, so I used applesauce with cinnamon. I also didn't have dark brown sugar... just light brown. All in all, they tasted AMAZINGLY awesome! Oh, and I used parchment paper to bake the cookies on.... for 10 minutes for chewy! Take them out before they get brown!!
Saturday, June 26, 2010
Texas Caviar (or in other words: Black Beans & Corn Salsa)
 This is NOT what the recipe makes! This is due to my three friends eating almost the whole bowl before I remembered to take a picture
... it's almost gone!
I seriously love this recipe. Some people call it Texas Caviar, some call it "Black Beans & Corn Salsa" I don't care what you call it... just make it!
Ingredients:
1 can black beans, drained & rinsed
1 can corn, drained
1 red pepper, diced
1/2 c diced red onion
Dressing:
4 Tbsp Olive Oil
1 tsp ground cumin
1/4 tsp salt & pepper each
4-6 Tbsp lime juice
**can add 1/4 c cilantro
**can add pickled jalapeno slices
Ingredients:
1 can black beans, drained & rinsed
1 can corn, drained
1 red pepper, diced
1/2 c diced red onion
Dressing:
4 Tbsp Olive Oil
1 tsp ground cumin
1/4 tsp salt & pepper each
4-6 Tbsp lime juice
**can add 1/4 c cilantro
**can add pickled jalapeno slices
Combine all ingredients and let mingle... overnight, if possible! If not possible, then at least 4 hours before you plan to serve or eat. You can also add green pepper, tomatoes, chopped parsley, garlic, etc. Just keep the proportions the same!
Amy's Notes: I have none! Just eat with tortilla chips or even add to salads! Top a grilled chicken with this!
Amy's Notes: I have none! Just eat with tortilla chips or even add to salads! Top a grilled chicken with this!
pepper jelly + canning!!
I had an opportunity a few weeks ago to host a Ball Canning party by House Party. They gave me EVERYTHING I needed to start canning... everything but the food. So while my mom was here in town, I made her teach me how to can. And can we did!!
First we started out washing our cans, lids & bands. Some people put it on the sanitize cycle on their dishwasher, but I don't have that cycle on mine. So we placed the jars inside a simmering hot pan of water (first time we submerged, the second time I did not submerge the jars). Set the lids in their own little pan and we started making the jelly!!
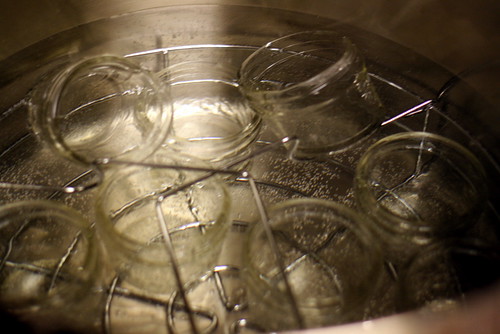
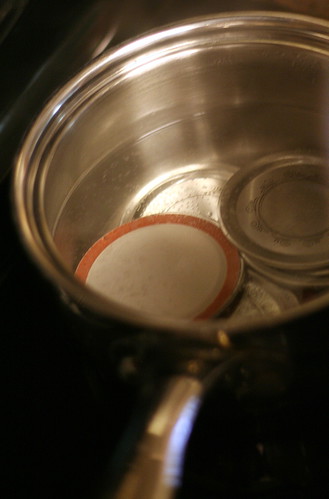 Ingredients:
4 1/2 c finely chopped green bell pepper (about 4 large)
1/2 c finely chopped jalapeno pepper (about 4 small)
1 1/4 c apple cider vinegar
1 pkg (1.75 oz) Ball No Sugar Needed Fruit Pectin
2 c sugar
1 c honey
12 Ball (4 0z) jelly jars w/ lids & bands
1) Prepare canner & jars as directed.
2) Combine green bell peppers, jalapeno peppers, & vinegar in a large saucepan. Gradually stir in pectin. Bring mixture to a full rolling boil that cannot be stirred down over high heat, stirring constantly.
3) Add sugar & honey. Return mixture to a full rolling boil. Boil hard for 3 minutes, stirring constantly. Remove from heat. Skim foam if necessary.

4) Ladle hot jelly into hot jars, leaving 1/4 headspace. Wipe rim and center lid on jar. Screw band on until fingertip-tight.
5) Process filled jars in boiling water for 10 minutes. Leave sitting on counter for 12-24 hours.

Amy's Notes: OK.... get a chopper if you've got one. I have a Pampered Chef chopper, and that literally saved my life! My hands too! For the jalapeno peppers, I wanted it a little hot, but not so hot that kids can't eat it, so I left two of them w/ the veins & seeds, and seeded/deveined the other two peppers. Another note to myself: start the pan w/ hot water quite a while before it's needed. The first time I canned, it took FOREVER and a day to get it boiling (always put the lid on it, which I didn't). The second time I canned, I added the lid and started the heat about half an hour before I needed to start.
If you have any leftover or run out of jars to place into, put the rest in a sealable container and eat over cream cheese with crackers!!

This is a perfectly little gift to take someone... like a hostess gift!
Or a little Christmas present for that someone!!
Make a whole bunch NOW so you're ready for whenever!
Seriously, the easiest recipe ever!
2) Combine green bell peppers, jalapeno peppers, & vinegar in a large saucepan. Gradually stir in pectin. Bring mixture to a full rolling boil that cannot be stirred down over high heat, stirring constantly.
3) Add sugar & honey. Return mixture to a full rolling boil. Boil hard for 3 minutes, stirring constantly. Remove from heat. Skim foam if necessary.
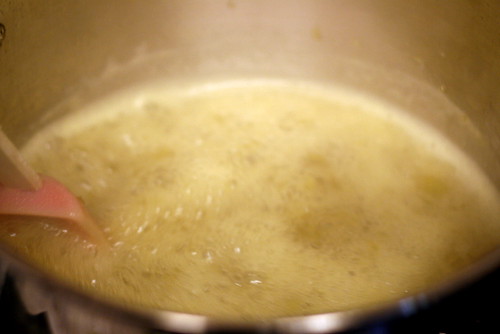
4) Ladle hot jelly into hot jars, leaving 1/4 headspace. Wipe rim and center lid on jar. Screw band on until fingertip-tight.
5) Process filled jars in boiling water for 10 minutes. Leave sitting on counter for 12-24 hours.
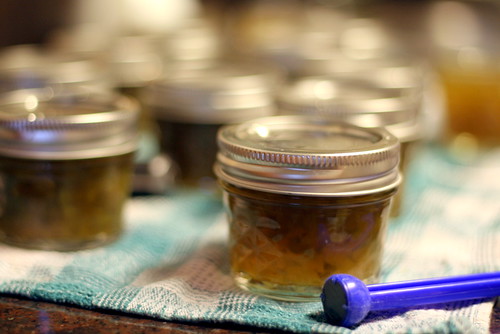
Amy's Notes: OK.... get a chopper if you've got one. I have a Pampered Chef chopper, and that literally saved my life! My hands too! For the jalapeno peppers, I wanted it a little hot, but not so hot that kids can't eat it, so I left two of them w/ the veins & seeds, and seeded/deveined the other two peppers. Another note to myself: start the pan w/ hot water quite a while before it's needed. The first time I canned, it took FOREVER and a day to get it boiling (always put the lid on it, which I didn't). The second time I canned, I added the lid and started the heat about half an hour before I needed to start.
If you have any leftover or run out of jars to place into, put the rest in a sealable container and eat over cream cheese with crackers!!
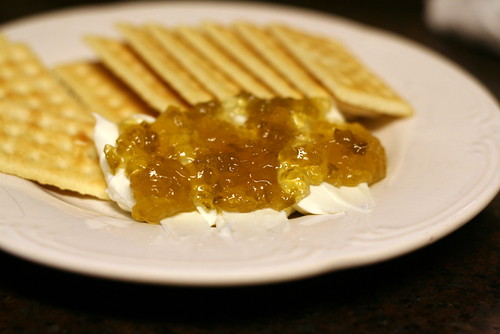
This is a perfectly little gift to take someone... like a hostess gift!
Or a little Christmas present for that someone!!
Make a whole bunch NOW so you're ready for whenever!
Seriously, the easiest recipe ever!
Many thanks to the Ball company for supplying this recipe! It's a winner!
Thursday, May 20, 2010
lemon bars
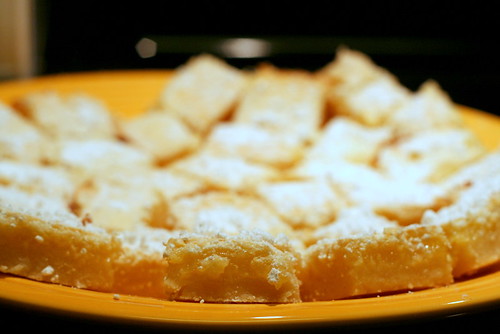
I was a lemon bar virgin. Never made them before... never *gasp* had them before! I really had NO clue what they were supposed to look like! I went searching for the perfect recipe, and found that almost all of the recipes were the exact same, only some had more flour, or less flour... some had less lemon, or more lemon... some called for lemon juice in a bottle, others said you HAVE to use fresh lemons. So, I used Paula Deen's recipe.
Ingredients
Crust:
2 c all purpose flour
1 c confectioner's sugar + more for dusting
pinch salt
2 sticks butter, at room temperature, + more for greasing
Filling:
4 eggs
2 c granulated sugar
6 tbsp all purpose flour
6 tbsp fresh lemon juice
Ingredients
Crust:
2 c all purpose flour
1 c confectioner's sugar + more for dusting
pinch salt
2 sticks butter, at room temperature, + more for greasing
Filling:
4 eggs
2 c granulated sugar
6 tbsp all purpose flour
6 tbsp fresh lemon juice
Preheat oven to 350 degrees F. Lightly grease a 9x13 pan.
Make the crust by combining the flour, sugar & salt in a large bowl. Cut in the butter to make a crumbly mixture. Press the mixture into the prepared pan. You may need to dip your fingers in a little flour or confectioner's sugar to keep the dough from sticking to your fingers. Bake for 20 minutes.
Meanwhile, to make the filling, mix the eggs, granulated sugar, flour & lemon juice. Pour this over the baked crust and bake for 25 minutes longer. Sprinkle with confectioner's sugar, if desired, when the bars are done.
Amy's Notes: I used Pam, not butter to grease my pan. I baked everything according to the directions, and it all turned out very yummy! On the actual website, you can see all the "well.. I would have done this... or that" type of tips, but I didn't use any of those. When I pulled it out of the oven, I was sure I did it wrong. Nothing looked like jelly for the lemon filling. But, it was there. I made it Friday night, and cut it up on Saturday morning!
Make the crust by combining the flour, sugar & salt in a large bowl. Cut in the butter to make a crumbly mixture. Press the mixture into the prepared pan. You may need to dip your fingers in a little flour or confectioner's sugar to keep the dough from sticking to your fingers. Bake for 20 minutes.
Meanwhile, to make the filling, mix the eggs, granulated sugar, flour & lemon juice. Pour this over the baked crust and bake for 25 minutes longer. Sprinkle with confectioner's sugar, if desired, when the bars are done.
Amy's Notes: I used Pam, not butter to grease my pan. I baked everything according to the directions, and it all turned out very yummy! On the actual website, you can see all the "well.. I would have done this... or that" type of tips, but I didn't use any of those. When I pulled it out of the oven, I was sure I did it wrong. Nothing looked like jelly for the lemon filling. But, it was there. I made it Friday night, and cut it up on Saturday morning!
Tuesday, April 27, 2010
Guenther House Quiche Muffins
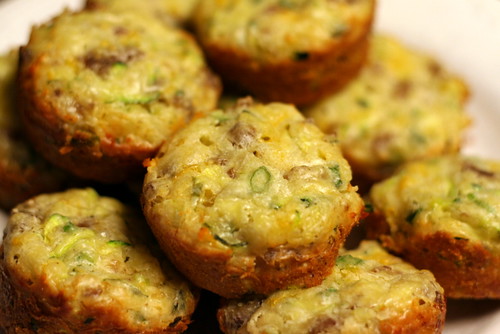
I had this recipe at a baby shower held at my friend Katie's house a few weeks ago. I kept going back for seconds... and thirds... and I finally stopped at fourths. They were SO delicious!!! These really are perfect for brunches, or breakfast/brunch baby showers!
Ingredients
2 eggs
1/2 c milk
1/3 c butter @ room temp
1 1/2 c Bisquik
1 c cooked & crumbled sausage
1 c shredded zucchini
1/3 c chopped green onion
1/3 c shredded cheddar cheese
1/3 c shredded Swiss cheese
1/3 c mozzarella or provolone cheese
2 eggs
1/2 c milk
1/3 c butter @ room temp
1 1/2 c Bisquik
1 c cooked & crumbled sausage
1 c shredded zucchini
1/3 c chopped green onion
1/3 c shredded cheddar cheese
1/3 c shredded Swiss cheese
1/3 c mozzarella or provolone cheese
Heat oven to 350. Grease muffin tins. Combine milk, butter, eggs, and Bisquik. Stir in sausage, zucchini, onion & cheeses. {at this point the mixture can be refrigerated overnight.} For regular muffins, bake about 20 minutes. For mini muffins, bake 15-18 minutes.
Amy's Notes: I doubled this recipe b/c I didn't want to let the sausage go to waste. I made SO many muffins! I baked 1 large tin of muffins, and two tins of mini muffins. I'm freezing the mini muffins now.... and so we can just pull them out and reheat when we want them!
Monday, April 26, 2010
starbuck's blueberry muffins
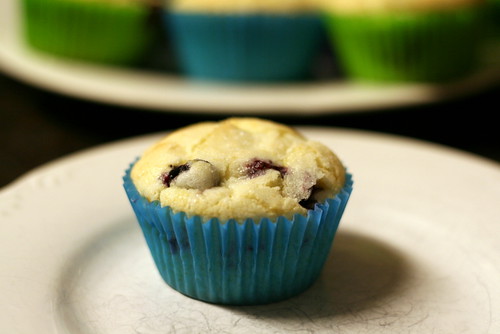 At work we have a Starbucks to cater to everyone. I love their pastries. So far my favorites are the Pumpkin Scones and since a few weeks ago, their Blueberry Muffins. Ooh, I'm in HEAVEN when I eat these (which have only happened twice). These muffins are so incredibly light, and are definitely not a heavy muffin. I scoured the internet for a knock off recipe, and I found it!!
Ingredients
1/2 tsp salt
3/4 c sugar
1/4 c soft butter
1 1/2 c pastry flour *** see notes
1/2 c milk
2 tsp baking powder
1 c wild blueberries
1 egg, beaten
1 grated lemon, rind of
Cream butter & sugar together, until light & fluffy. Add the egg, and mix well. Sift dry ingredients together. Add flour mixture to the butter mixture, alternating with milk. Make sure you begin and end with the flour (not sure why it works best this way, but it does). Toss blueberries with lemon rind and carefully fold into batter. Do NOT overmix! Fill a muffin tin with paper or grease w/ butter. Fill 2/3 full with batter. Bake in preheated 375 oven for 15-20 minutes. Remove from tins & cool on rack!
 isn't this pretty? It really had a beautiful color... but this is what your dough will look like
Amy's Notes: OK... my first thought when I read this recipe was "what in the heck is pastry flour?" I scoured my store for pastry flour, and I finally asked a little old lady if it was the same thing as cake flour. She said yes. WRONG! It's not! However, if you add a little more cake flour, then it's OK. Basically, for each cup of pastry flour, you add 1 cup + 2 tbsp of cake flour. So, by my calculations, I added 1 1/2 c + 3 tbsp of cake flour instead of pastry flour. Next, I didn't have wild blueberries. I have blueberries from the store, so I used those. I also sprinkled some sugar on the top of the muffins before they baked. This recipe yielded about 14 muffins for me.

Results? Oh.My.GOODNESS! These are hands down (and feet if I can count those) the BEST blueberry muffins I have EVER eaten (OK, other than Starbucks). These are the best homemade muffins ever. They are so light, so moist. I baked for about 18 minutes as 15 minutes for me was still a little wet.
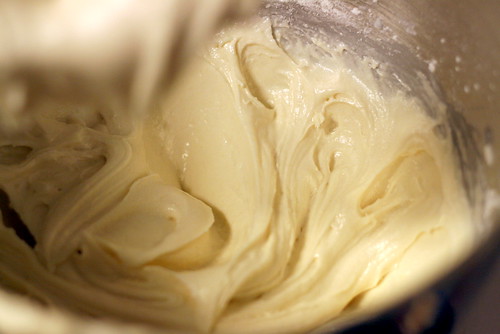 isn't this pretty? It really had a beautiful color... but this is what your dough will look like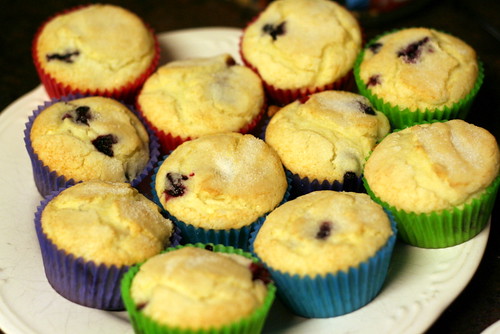
Results? Oh.My.GOODNESS! These are hands down (and feet if I can count those) the BEST blueberry muffins I have EVER eaten (OK, other than Starbucks). These are the best homemade muffins ever. They are so light, so moist. I baked for about 18 minutes as 15 minutes for me was still a little wet.
Saturday, March 6, 2010
how to boil an egg
I can never get it right. Ever. I always have a grey or green outline when I boil my eggs. Ick! I googled months ago to find a "how to", and found one! Used it several times! But now I can't find it again.... I think I found the website, but not sure. I'm using it this time, just in case I can't find it AGAIN!
1) Place eggs in a saucepan. Cover them with cold water, add an inch or two above the eggs. Do NOT salt the water. Place on burner on HIGH heat.
2)Place on burner on HIGH heat. Once they start to boil turn on the timer to 3 minutes.
3) When the timer goes off, quickly take off the heat, put on the lid and reset the timer to 8 minutes.
4) When 8 minutes are up, take to sink and run cold water over them for about a minute, let them soak a bit to cool off. They will peel best if you set them in the refrigerator for about 1/2 to 1 hour, but you can eat them now!
What to do if your egg......
1) Place eggs in a saucepan. Cover them with cold water, add an inch or two above the eggs. Do NOT salt the water. Place on burner on HIGH heat.
2)Place on burner on HIGH heat. Once they start to boil turn on the timer to 3 minutes.
3) When the timer goes off, quickly take off the heat, put on the lid and reset the timer to 8 minutes.
4) When 8 minutes are up, take to sink and run cold water over them for about a minute, let them soak a bit to cool off. They will peel best if you set them in the refrigerator for about 1/2 to 1 hour, but you can eat them now!
What to do if your egg......
-
If the egg stays at the bottom - it is fresh.
-
If the egg is at an angle on the bottom - it is still fresh and good to eat.
-
If the egg stands on its pointed end at the bottom - it is still safe to eat but best used for baking and making hard-cooked eggs.
-
If the egg floats - they're stale and best discarded.
Subscribe to:
Posts (Atom)


 Posts
Posts

